You hear a faint drip-drip-drip in the attic after a heavy rain. It's easy to dismiss, to place a bucket and promise yourself you'll deal with it next month. This was the exact scenario for one family, whose decision to postpone a simple roof leak repair spiraled into a nightmare of structural damage, toxic mold, and a six-figure financial loss. Their story isn't an anomaly; it's a stark warning about the hidden costs of water intrusion. Understanding the urgency and process of proper roof leak repair is not just about fixing shingles—it's about protecting your home's integrity, your health, and your financial security.
A roof leak repair addresses the point where water breaches your home's primary defense. Ignoring it is a gamble where the house always wins, and the stakes include everything from ruined insulation and damaged drywall to compromised electrical systems and foundational rot. The family in our case study learned this the hard way. Their initial estimate for a minor $400 repair ballooned into over $85,000 in remediation, reconstruction, and temporary housing costs after just eight months of neglect. This article will dissect their experience, providing you with a clear, actionable framework to identify, address, and prevent catastrophic outcomes from a roof leak.
The True Cost of Delay: A Cautionary Tale
The Johnson family noticed a small water stain on their ceiling in early fall. It appeared directly under a section of roof where two planes met—a common trouble spot. Mr. Johnson climbed into the attic, saw a minor drip into a placed bucket, and assumed the problem was manageable. He received a quote for a roof leak repair focusing on resealing a valley flashing. At $375, it seemed reasonable, but other expenses took priority. Deferred maintenance is the single greatest contributor to premature home system failure.
Over the winter, the intermittent drip continued. Water traveled along rafters, soaking the attic insulation, which lost its R-value and compressed. By spring, the stain on the ceiling had grown, and a musty odor became noticeable in the upstairs hallway. The family finally called a different contractor, who discovered far more than a simple leak. The plywood roof decking was 30% rotted in a four-foot section. Insulation was waterlogged and moldy. More critically, water had tracked down an interior wall cavity, fostering Stachybotrys chartarum—black mold—behind the drywall.
Watch Out
Black mold exposure can cause severe respiratory issues, chronic fatigue, and headaches. Remediation requires professional containment and removal, which standard homeowners insurance often excludes unless the leak was sudden and accidental.
The project scope exploded. What began as a roof leak repair now required: full mold remediation with containment chambers ($12,000), removal of damaged roof decking and rafters ($8,500), replacement of interior drywall and insulation in two rooms ($6,200), repainting, and air quality testing. The family had to relocate to a hotel for three weeks during the worst of the work. Their insurance covered only a fraction, citing "long-term seepage" as an exclusion. The final bill exceeded $85,000, a life-altering expense that started with a drip.
Never treat a roof leak as a minor nuisance. Water damage is progressive and exponential; a repair delayed by months can multiply costs by a factor of 100 or more.
Identifying a Roof Leak: More Than Just a Drip
Early detection is your most powerful tool. A proactive roof leak repair is always cheaper than a reactive one. Leaks often manifest far from their actual entry point. Water follows the path of least resistance along framing members, electrical wires, or pipes before gravity pulls it down. Don't just look at the ceiling stain—investigate its origin.
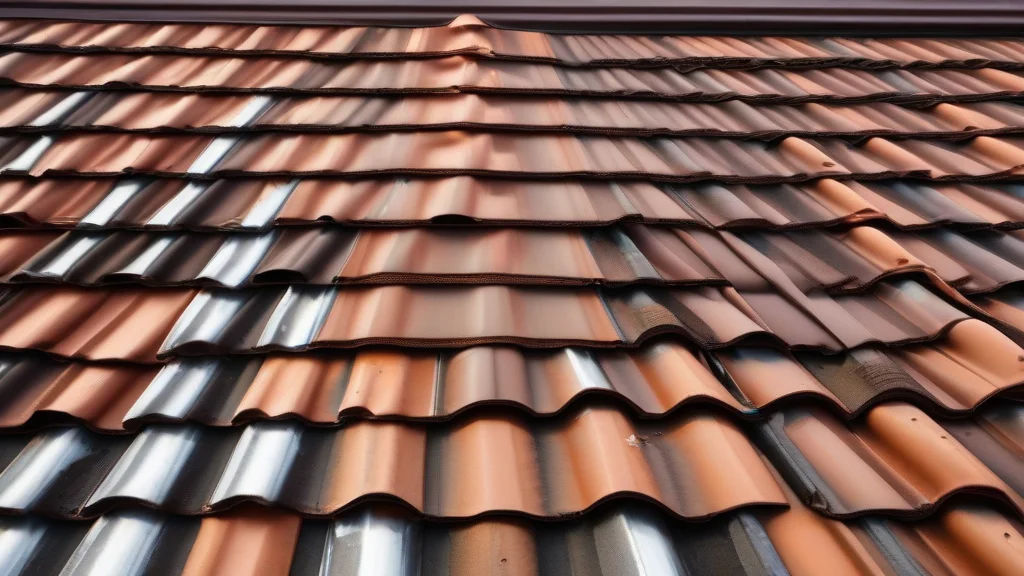
Common interior signs include discolored ceiling patches or walls, peeling paint or wallpaper, a persistent musty smell, damp spots in the attic insulation, or even warped flooring on the top level. Exterior clues are just as telling. Look for missing, cracked, or curled shingles. Pay special attention to areas where the roof meets vertical surfaces like chimneys, walls, or skylights—these flashings are the most frequent failure points. Clogged gutters can force water under roof edges, and damaged vent boots are another classic culprit.
- Locate the Active Leak
During rain, safely access your attic with a flashlight. Look for shiny wet trails on wood, active drips, or darkened, damp insulation. Use a tape measure to note the distance from the leak to a fixed point (like the chimney) to help the roofer find the external source.
- Contain the Damage
Place buckets or plastic sheeting to catch water. Move valuables and furniture from the area. Puncture a small hole in the center of a sagging ceiling bulge to release trapped water and prevent a catastrophic collapse.
- Document Everything
Take clear, dated photos and videos of all damage, both inside and out. This creates a crucial record for insurance claims and provides contractors with clear information for accurate quotes.
When to Call a Professional Immediately
Some situations warrant an emergency call, bypassing the multi-quote process. If you see sagging ceilings, hear active dripping inside light fixtures or electrical panels, or notice water spreading rapidly across a ceiling, you need immediate intervention. These signs indicate significant water accumulation that threatens structural integrity or poses an electrocution hazard. A 24-hour emergency roof leak repair service will implement temporary containment measures to stabilize the situation until permanent repairs can be scheduled.
Roof Leak Repair: Your Step-by-Step Action Plan
Once you've identified a leak, a systematic approach ensures a quality, lasting fix. Rushing the process or choosing the cheapest bidder often leads to repeat failures. A proper roof leak repair follows a logical sequence: diagnosis, temporary protection, contractor selection, repair execution, and verification.
Did You Know?
Over 90% of "repaired" leaks that fail within a year are due to an incorrect initial diagnosis. Professionals use moisture meters, thermal imaging, and thorough inspections to find the true entry point, not just the symptom.
Start by securing temporary protection if a professional can't come immediately. From the attic, you can sometimes push a nail or screw up through the underside of the roof at the leak point to mark it for the roofer. Externally, a heavy-duty tarp secured over the suspected area can divert water. This is only a stopgap. Tarps degrade in UV light and wind, and improper installation can cause more damage. The core of your plan is hiring the right professional.
Before contractors arrive, clear the perimeter around your house and ensure easy access to the attic. This saves time and shows preparedness, which can reflect in the professionalism of the estimates you receive.
Hiring the Right Professional: Vetting Your Roofer
The difference between a botched patch job and a decades-long fix comes down to the contractor you hire. The roofing industry, especially after major storms, attracts unqualified "storm chasers." Your due diligence is non-negotiable. A reputable roof leak repair specialist will have verifiable credentials, clear communication, and a physical local presence.
Always get at least three detailed, written estimates. The quote should be a multi-page document, not a number scribbled on a business card. It must specify the exact cause of the leak, the materials to be used (brand, type, color), the scope of work, a start and completion date, a payment schedule, and warranty terms. Beware of any contractor who asks for full payment upfront or only accepts cash.
HomeProMatcher
Platforms like HomeProMatcher streamline this vetting process. Instead of endless online searches and cold calls, you answer a few questions about your roof leak repair project. The service then matches you with up to three local, licensed, and insured roofing contractors who have been pre-screened. You get qualified leads without the legwork, and the pros are motivated to provide competitive bids to win your business.
Your vetting checklist should be rigorous. Here are the non-negotiable items to verify:
- State License — Confirm it's current and in good standing via your state's contractor licensing board website.
- Insurance Proof — Request a Certificate of Insurance (COI) showing both liability and workers' compensation coverage. Without it, you could be liable for on-the-job injuries.
- Local References — Ask for 2-3 recent references for similar repair work and actually call them. Ask about cleanliness, communication, and post-repair follow-up.
- Better Business Bureau — Check the BBB profile for rating, complaint history, and accreditation.
- Manufacturer Certifications — Many shingle manufacturers (like GAF, CertainTeed) certify installers. This often comes with enhanced warranties.
- Detailed Contract — Never proceed without a signed contract that includes all elements of the written estimate and a clear "right to cancel" clause if required by law.
Understanding Repair Costs and Avoiding Scams
Roof leak repair costs are notoriously variable. A simple shingle replacement might be $250-$750, while repairing complex flashing around a chimney could run $1,000-$2,500. If decking replacement is needed, add $75-$150 per sheet of plywood, plus labor. The national average for a professional, mid-range repair falls between $850 and $1,800. These numbers hinge on your roof's pitch, material, accessibility, and the repair's complexity.
Scammers exploit the urgent, stressful nature of a leak. Major red flags include door-to-door solicitation after a storm, high-pressure sales tactics, a refusal to provide written details, a request for a large cash deposit, or an offer to "handle your insurance claim" for you (which can be illegal adjusting). A legitimate contractor will encourage you to contact your insurer directly and will work with the adjuster you assign.
Signs of a Trustworthy Pro
- Provides a detailed, written estimate with line-item costs
- Answers questions patiently and explains the repair process
- Has a local office and a professional website
- Offers a strong warranty on both materials and labor
Scam Warning Signs
- "Leftover materials" discount from a "job nearby"
- Demands full payment before any work begins
- Unmarked trucks and vague company names
- Pressure to sign immediately with a "today-only" discount
Understanding your insurance policy is crucial. Most standard policies cover damage from sudden, accidental events like a tree limb puncturing the roof. They typically exclude damage from wear and tear, lack of maintenance, or long-term seepage. Filing a claim starts with a phone call to your agent, followed by an adjuster's inspection. Your chosen contractor can then meet with the adjuster to ensure the scope and estimate align for a complete roof leak repair.
Prevention Is Cheaper Than Cure
The ultimate roof leak repair is the one you never need. Proactive maintenance is staggeringly cost-effective. Biannual inspections—once in spring and once in fall—can identify minor issues before they become major leaks. You can do a basic visual check from the ground with binoculars, looking for problem signs. However, hiring a professional for a $150-$300 inspection every 2-3 years is a wise investment.
Key maintenance tasks include keeping gutters clean and free-flowing to prevent ice dams and water backup. Trimming overhanging tree branches eliminates abrasion on shingles and reduces debris accumulation. After severe storms, check your attic for any signs of moisture or light penetration. Ensure bathroom, kitchen, and dryer vents exhaust outside the roof, not into the attic, as this moisture promotes rot.
Great News
Modern roofing materials and techniques, like self-sealing ice and water shield underlayment and improved flashing designs, offer much better protection than homes built just 20 years ago. A quality repair using these materials can extend your roof's life significantly.
Know your roof's expected lifespan. Asphalt shingles last 15-30 years, wood shakes 20-40 years, and metal or tile 40-70 years. If your roof is in the latter half of its lifespan and you're facing recurrent leaks, a full replacement may be more economical than continual patchwork roof leak repair. A new roof also boosts property value and insurability.
Frequently Asked Questions
Frequently Asked Questions
For very minor, accessible issues, you might apply roofing cement or a peel-and-stick patch from a hardware store as a short-term emergency measure. However, DIY fixes are rarely permanent and can void manufacturer warranties. Misdiagnosis is common. For any leak that's more than a trivial seepage, or if you're uncomfortable on a roof, calling a professional is the safer, more reliable choice for a proper roof leak repair.
Most straightforward repairs can be completed in 4 to 8 hours by a two-person crew, often in a single day. Complex repairs involving structural wood replacement, multiple leak points, or matching historical materials may take 2 to 3 days. Always factor in scheduling time—reputable rooffers are often booked weeks in advance during peak seasons.
It depends entirely on the cause. Insurance typically covers sudden, accidental damage (like hail damage or a fallen tree). It almost always excludes repairs needed due to normal wear and tear, age, or lack of maintenance. The key is whether the leak resulted from a covered peril. You must review your specific policy and discuss the cause with your adjuster.
Spring and fall offer the most stable, dry weather for roofing work. Summer heat can make shingles pliable and difficult to handle, and winter brings cold temperatures that can affect sealing materials and ice hazards. However, a roof leak repair should never be delayed due to season—active leaks cause damage year-round. Reputable contractors work in all seasons with appropriate precautions.
A reputable roofer will provide two warranties. The first is the manufacturer's material warranty on the shingles or flashing (often 25+ years). The second, and equally important, is the contractor's workmanship warranty, which should cover labor and installation for at least 2-5 years. Ensure both are provided in writing, specifying what is covered and any transferability if you sell the home.