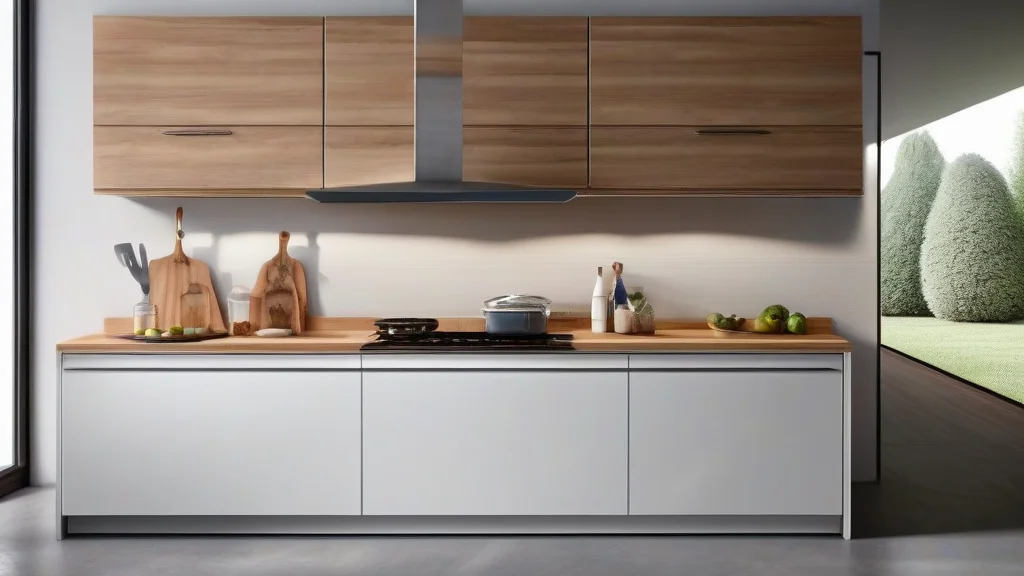
- The Work Triangle Secret: Why It's Non-Negotiable
- Measuring Your Triangle: A Step-by-Step Guide
- Design Solutions for Every Kitchen Shape
- Common Mistakes That Sabotage Your Layout
- Hiring the Right Pro for Your Kitchen Remodeling Project
- Beyond the Triangle: Modern Layout Considerations
- Frequently Asked Questions
You’ve picked your cabinets, chosen your countertops, and fallen in love with a backsplash. But there’s one measurement that professional kitchen designers always take before a single tile is laid, and it has nothing to do with aesthetics. Successful kitchen remodeling hinges on a century-old principle called the work triangle. Ignoring this foundational concept is the single biggest mistake homeowners make, leading to a beautiful kitchen that’s frustrating to use daily. This article will show you exactly what to measure, why it matters, and how to ensure your kitchen remodeling project delivers both form and flawless function.
The work triangle is the invisible line connecting your three primary work zones: the sink, the stove, and the refrigerator. This isn't just designer jargon; it's a proven ergonomic guideline that minimizes wasted steps, prevents bottlenecks, and creates a natural, efficient workflow. Whether you're preparing a weekday dinner or hosting a holiday feast, the distance and relationship between these three points dictate your daily experience. A well-planned triangle transforms cooking from a chore into a pleasure, while a poor one can make even a million-dollar renovation feel cramped and chaotic. Understanding this principle is your first step toward a truly intelligent kitchen remodeling plan.
The Work Triangle Secret: Why It's Non-Negotiable
Developed in the 1940s by the University of Illinois School of Architecture, the work triangle concept was born from time-motion studies aimed at improving kitchen efficiency for the modern homemaker. Decades later, its core truth remains unchanged: the human body moves most efficiently in a triangular pattern between these three critical stations. A proper triangle prevents you from walking a marathon in your own kitchen. It ensures you can pivot from washing vegetables at the sink to sautéing them at the stove without crossing the path of another person grabbing a drink from the fridge. This is the functional backbone of any kitchen remodeling project.
Adhering to the triangle's guidelines solves the most common kitchen complaints. Have you ever felt like you're constantly bumping into cabinet doors or other people? That's often a result of a pinched triangle, where the legs are too short. Do you find yourself exhausted from trekking back and forth across a sprawling kitchen? That's a stretched triangle with legs that are too long. The goal is to find the sweet spot where everything is within easy reach, but not so close that the space feels cramped. Professional designers treat these measurements as sacred because they impact safety, efficiency, and resale value. A homebuyer will instinctively feel the difference between a kitchen that flows and one that fights them.
Never finalize a kitchen remodeling layout without calculating the work triangle's dimensions. It is the most reliable predictor of whether your new kitchen will be a joy or a burden to use.
The Golden Rules of the Triangle
While the work triangle is a guideline rather than a strict code, these measurements are industry standards for a reason. They are based on decades of observing how people actually move and work in a kitchen.
- Each Leg Length — Should be between 4 and 9 feet. Less than 4 feet creates a cramped, unsafe zone where appliances and people collide. More than 9 feet turns simple tasks into tiring journeys.
- Total Perimeter — The sum of all three legs should not exceed 22 feet. Staying under this total ensures all major work areas are conveniently grouped without excessive walking.
- Clearance is Key — No major traffic patterns, like a doorway or main walkway, should cut through the triangle. This prevents collisions and keeps the cook's zone uninterrupted.
- Cabinet Interference — The triangle legs should not be bisected by full-height cabinets or tall obstacles like a pantry. An open, clear path is essential for efficiency.
Remember, these are targets, not absolutes. In a very small galley kitchen, you might dip slightly under the minimums. In a large, open-concept space designed for multiple cooks, you might creatively adapt the principle into multiple, overlapping triangles. The key is to be intentional about the distances. Measuring them forces you to think critically about workflow, which is the entire point of intelligent kitchen remodeling.
Measuring Your Triangle: A Step-by-Step Guide
Before you can improve your work triangle, you need to measure your existing one. This exercise is eye-opening for homeowners planning a remodel, as it quantifies the frustrations they’ve only felt intuitively. You don't need fancy tools—just a tape measure, a pencil, and your floor plan. If you're working with a designer or contractor for your kitchen remodeling project, they should do this automatically. If they don't, consider it a major red flag.
Always measure from the center of each appliance or fixture, not the edge. This accounts for the space you actually occupy when using the sink, stove, or refrigerator door.
- Identify Your Three Points
Locate the exact center point of your primary sink, your main cooking surface (whether it's a range or cooktop), and your primary refrigerator. These are the three anchors of your triangle.
- Measure the Three Legs
Using your tape measure, find the distance from the sink center to the stove center. Record it. Then measure from the stove center to the fridge center. Finally, measure from the fridge center back to the sink center. You now have three numbers.
- Calculate and Analyze
Add your three measurements together to get the total triangle perimeter. Then, check each individual leg against the 4-9 foot rule. Where do your numbers fall? Are you cramped, stretched, or just right? This analysis becomes the starting point for your new kitchen remodeling design.
This simple audit reveals the root cause of many kitchen headaches. A total perimeter of 28 feet explains why you get your steps in while cooking. A leg of 2.5 feet between the stove and sink highlights why you burn yourself when moving hot pans. This data is power. It moves the conversation with your contractor from "I want it to feel more open" to "We need to increase the sink-to-fridge leg from 11 feet to 7 feet." That specificity leads to better outcomes and proves you’ve done your homework.
Design Solutions for Every Kitchen Shape
Not every kitchen is a perfect blank slate. You may be working around structural walls, plumbing stacks, or budget constraints that limit how far you can move major appliances. The good news is that the work triangle principle is adaptable. Different kitchen layouts—galley, L-shaped, U-shaped, and island kitchens—each have their own optimal way to implement the triangle. Your kitchen remodeling plan should start by identifying your layout type and then optimizing the triangle within it.
Did You Know?
The classic work triangle is designed for a single cook. For households with multiple people cooking regularly, designers now plan for "work zones" (prep, cooking, cleanup) that can function simultaneously without crossing paths.
In a galley or corridor kitchen, the triangle often flattens into more of a line, with the sink and stove on one side and the fridge on the opposite wall. The key here is to keep the opposing cabinets close enough that you can turn, not walk, between them. A width of 4 to 5 feet between the two parallel runs is ideal. The L-shaped kitchen is a classic triangle champion, naturally placing each point on a different leg of the L. This layout often provides excellent traffic flow and clear countertop landing space next to each appliance.
The U-shaped kitchen envelops the cook on three sides, which can be highly efficient but risks a pinched triangle if the "U" is too narrow. Here, placing one point (usually the sink) in the center of the base and the other two at the ends of the arms often works best. Finally, the kitchen with an island introduces exciting possibilities and new pitfalls. A popular and effective move is to place the sink or cooktop in the island, creating a dynamic, social cooking space. However, you must ensure the island doesn't become a barrier that stretches a triangle leg too far or, worse, gets bisected by a high-traffic path to the patio or dining room.
Common Mistakes That Sabotage Your Layout
Even with the best intentions, it's easy to undermine your work triangle during the excitement of designing a new kitchen. These errors often stem from prioritizing looks over function or making decisions in isolation. Being aware of these pitfalls can save you from regret after your kitchen remodeling project is complete.
- Placing the Fridge Too Far Away — It's tempting to tuck the fridge at the end of a run or in a pantry nook for a streamlined look. But if it's more than 9 feet from your main prep area, you'll curse it every time you need butter or eggs.
- Island as a Roadblock — An island that's too large or poorly positioned can stretch triangle legs to breaking point. Ensure there's a clear 42 to 48 inches of walkway between the island and surrounding cabinets.
- Ignoring Appliance Door Swing — A refrigerator door that opens into the path between the fridge and sink, or an oven door that blocks the route to the dishwasher, creates instant bottlenecks. Always map door arcs in your plan.
- Forgetting Landing Space — You need clear counter space next to each appliance: at least 15 inches next to the fridge, 18 inches on one side of the sink and 24 inches on the other, and 12 to 18 inches on either side of the cooktop.
The most expensive mistake is failing to live in the plan before construction starts. Use painter's tape on the floor to mark out cabinet footprints and appliance locations. Walk through the motions of making a meal, unloading groceries, and cleaning up. This physical test will instantly reveal if your dream layout has a fatal flow flaw. This step is non-negotiable in professional kitchen remodeling and should be for yours, too.
Important
Never let a contractor or designer talk you into a layout that violates core work triangle principles without a compelling, functional reason. "It will look better" is not a good enough reason to accept a dysfunctional kitchen.
Hiring the Right Pro for Your Kitchen Remodeling Project
Understanding the work triangle empowers you to be an informed partner in your remodel. But executing a successful kitchen remodeling project requires skilled professionals. The wrong contractor can turn your optimized layout into a costly nightmare. Knowing how to vet and hire is as crucial as knowing what to measure.
Start by verifying credentials. A legitimate kitchen remodeling contractor should be licensed, insured, and bonded. Ask for proof and check their standing with your state's licensing board. Look for specific experience in kitchen remodeling—a general handyman is not equipped for the complex plumbing, electrical, and structural work involved. Next, scrutinize their portfolio and ask for references from projects completed in the last 12 months. When you speak to those references, ask specific questions about workflow: "Is the kitchen easy to cook in for multiple people?" or "Does the layout make sense when you're cleaning up?"
Signs of a Great Pro
- Asks About Your Workflow — They inquire about how you cook, entertain, and use the space before drawing a single line.
- Provides Detailed Plans — Offers scaled drawings that include the work triangle dimensions and clearances.
- Communicates Clearly — Explains the "why" behind layout suggestions and doesn't dismiss your concerns.
- Fixed-Price Contract — Provides a comprehensive, line-item quote rather than a vague estimate.
Major Red Flags
- No Written Contract — Insists on a handshake deal or refuses to detail scope, timeline, and payment schedule.
- Large Upfront Payment — Demands more than 10-15% as a deposit before any work begins.
- Vague on Permits — Suggests skipping permits to "save time and money," which is illegal and risky.
- Poor Reviews or No Portfolio — Cannot provide recent examples of completed kitchen remodeling work or has consistent negative feedback online.
Getting multiple quotes is essential, but comparing them can be confusing. Ensure each bid is for the exact same scope of work—appliances, materials, and labor. The cheapest quote is often the most expensive in the long run due to corners cut, change orders, and subpar workmanship. Instead, look for the quote that offers the best value: clear communication, a solid process, and a proven track record of creating functional kitchens. A platform like HomeProMatcher simplifies this by connecting you with pre-screened, licensed local professionals who specialize in kitchen remodeling, taking the guesswork out of finding qualified help.
Beyond the Triangle: Modern Layout Considerations
While the work triangle remains foundational, today's lifestyles demand additional considerations. Our kitchens are now command centers for family life, homework, and entertaining. A truly modern kitchen remodeling plan integrates the triangle with these contemporary needs.
Think about creating distinct work zones. Beyond the big three appliances, you need a dedicated prep zone with ample counter space near the sink, a cooking zone with landing space and utensil storage, and a cleanup zone housing the sink, dishwasher, and recycling. For multiple cooks, these zones should allow parallel activity without collision. Also, consider the "landing zone" near the refrigerator—a counter where you can temporarily place grocery bags before putting items away. This small detail prevents kitchen traffic jams.
HomeProMatcher
Connects homeowners with vetted, licensed kitchen remodeling contractors in their area. Their matching service is based on your project scope, budget, and timeline, eliminating endless searches and unreliable leads. You get a direct connection to a pre-qualified pro, streamlining the hiring process for major renovations.
Technology and storage have also evolved. Integrating outlets for small appliances into your island or peninsula, planning for charging stations, and designing specialized storage for everything from air fryers to baking sheets are now standard expectations. The ultimate goal is a kitchen that honors the efficient workflow of the classic triangle while adapting to how we live now—multifunctional, social, and personalized. Your kitchen remodeling project is your chance to build that perfect blend of timeless principle and modern convenience.
The most successful kitchen remodeling projects marry the timeless efficiency of the work triangle with personalized zones for prep, cleanup, and modern life, creating a space that is both beautiful and brilliantly functional.
Frequently Asked Questions
Not at all. In fact, it's more critical. Open concepts create more opportunities for major appliances to be spread too far apart. The triangle principles keep your core cooking zone efficient, even within a larger space. The guidelines may flex slightly, but the goal of convenient proximity between sink, stove, and fridge remains paramount.
You can, but efficiency will suffer. A perimeter exceeding 22 feet means you are taking extra steps for every basic cooking task. In very large or multi-cook kitchens, designers might create secondary or overlapping triangles (like a baking zone or a beverage center) to keep specific workflows tight, but the primary triangle should still be optimized.
In very compact spaces, like some galley kitchens, you may have a leg slightly under 4 feet. The priority then becomes avoiding a pinch point. Ensure there is adequate clearance for appliance doors to open fully and for people to pass by safely. Every inch counts, and smart storage solutions become essential to prevent clutter from encroaching on the already tight workspace.
Ultimately, you are, as the homeowner. However, any competent kitchen designer, architect, or remodeling contractor should guide you through this process. If a pro doesn't mention or measure the work triangle, it's a serious warning sign. You should collaborate with them, using your knowledge of how you live to inform the final, optimized layout.