Your dream garden doesn't have to be a distant fantasy reserved for magazine spreads or luxury properties. In fact, transformative landscaping is more accessible than you think. The idea that a beautiful, functional outdoor space requires a massive investment is one of the biggest myths in home improvement. With strategic planning and smart choices, you can achieve a stunning transformation for less than the cost of a nice dinner out for two. This guide will walk you through the specific, budget-conscious projects that deliver the highest visual impact and return on investment.
Effective landscaping is about working smarter, not spending more. It focuses on maximizing the value of every dollar and every square foot of your yard. Whether you're looking to boost your home's curb appeal before a sale or simply create a personal oasis, the principles remain the same: prioritize projects with high visual payoff, choose low-maintenance materials, and understand where a professional's touch is worth the cost versus where your own effort can save you thousands. Let's redefine what's possible in your outdoor space.
The Budget-Friendly Landscaping Makeover
Starting a landscaping project with a limited budget isn't a constraint—it's a creative catalyst. The key is to adopt a phased approach. Instead of viewing your yard as one massive, expensive job, break it down into manageable zones or feature types. Tackle the entryway focal point first, then move to a side yard transformation, and finally address the backyard living space over time. This spreads out costs and allows you to learn as you go. A common mistake is pouring money into high-cost items like mature trees or intricate water features first, when simpler foundational work like soil amendment and defining bed lines offers a much bigger bang for your buck.
Your budget should be allocated across three core categories: plants, hardscape materials, and labor. A golden rule for cost-effective landscaping is to spend roughly 60% of your budget on long-lasting hardscape and structural elements, 30% on quality plants, and reserve 10% for professional help on tasks that require expertise, like grading or installing an irrigation system. This allocation ensures your money builds permanent value. Remember, the most expensive part of any project is often the labor. By identifying which tasks you can confidently DIY, you can redirect those funds toward higher-quality materials that will last for decades.
Did You Know?
Basic landscaping maintenance, like edging beds, mulching, and pruning, can increase perceived home value by up to 12%. It's not always about adding new features—sometimes, it's about perfecting what you already have.
Setting Realistic Project Phases
To avoid overwhelm and budget blowouts, plan your landscaping in distinct, achievable phases. Phase One should always be cleanup and clarity: remove dead plants, define your lawn edges, and add a fresh layer of mulch. This alone can make a yard look professionally maintained for under $200. Phase Two introduces structure: a simple stone path, a small retaining wall for a sloped area, or a defined patio space using pavers or gravel. Phase Three is where you add the living layer—your shrubs, perennials, and ornamental grasses. This phased method prevents you from buying plants before you have a proper place for them, which is a frequent budget drain.
The most cost-effective landscaping strategy is a phased approach: start with cleanup and definition, add structural hardscaping second, and introduce plants last. This prevents wasted spending and builds a permanent foundation for your garden.
Smart Planting: High-Impact, Low-Maintenance Choices
Plant selection is where many homeowners make expensive, long-term mistakes. The goal is to choose plants that provide maximum visual interest across multiple seasons while demanding minimal water, fertilizer, and pruning. Native plants are your best friend in budget landscaping. They are already adapted to your local climate and soil, which means they require less babysitting and are more resistant to local pests and diseases. Investing in a few larger, well-placed native shrubs as anchors is smarter than scattering dozens of small, annual flowers that need replacing every year.
Think in layers and seasons. A well-designed planting bed includes a mix of evergreen structure, flowering perennials for seasonal color, and ornamental grasses for winter texture. For example, a bed anchored by a dwarf evergreen shrub like a boxwood, filled with black-eyed Susans and purple coneflower, and edged with blue fescue grass provides year-round interest. This approach to landscaping eliminates the "bare spot" problem that leads to impulse buys at the garden center. Always buy perennials in smaller sizes; a 1-gallon plant will often catch up to a 3-gallon plant within a single growing season for half the price.
Advantages of Native Plants
- Lower Water Bills — Adapted to local rainfall, they need far less supplemental irrigation.
- Fewer Pesticides — Naturally resistant to local pests, reducing chemical needs and costs.
- Supports Wildlife — Provides essential habitat for birds, bees, and butterflies.
- Long-Term Health — More likely to thrive long-term, avoiding costly replacement.
Disadvantages of High-Maintenance Plants
- Constant Watering — Non-native or thirsty plants spike your utility bills.
- Frequent Replacement — Tender annuals or poorly suited perennials die and need repurchasing.
- Disease Susceptibility — Can introduce new pests or fungi that threaten other plants.
- Labor Intensive — Require more pruning, staking, and fertilizing, adding to your workload.
The Thriller, Filler, Spiller Method for Containers
For instant, movable color that costs under $50 per pot, use the container formula perfected by professional landscapers. Choose a tall, dramatic "thriller" plant (like a cordyline or ornamental grass) for the center. Surround it with several bushy "filler" plants (like begonias or coleus) to add volume. Finally, select trailing "spiller" plants (like ivy or sweet potato vine) to cascade over the edge. This single container provides the visual impact of a small flower bed and can be moved to stage your entryway or patio perfectly. It's a cornerstone of affordable, high-style landscaping.
Great News
Many local conservation districts or university extension offices hold annual native plant sales where you can get high-quality, ecologically beneficial plants for a fraction of nursery prices, often under $5 per pot.
DIY Hardscaping & Structure Projects
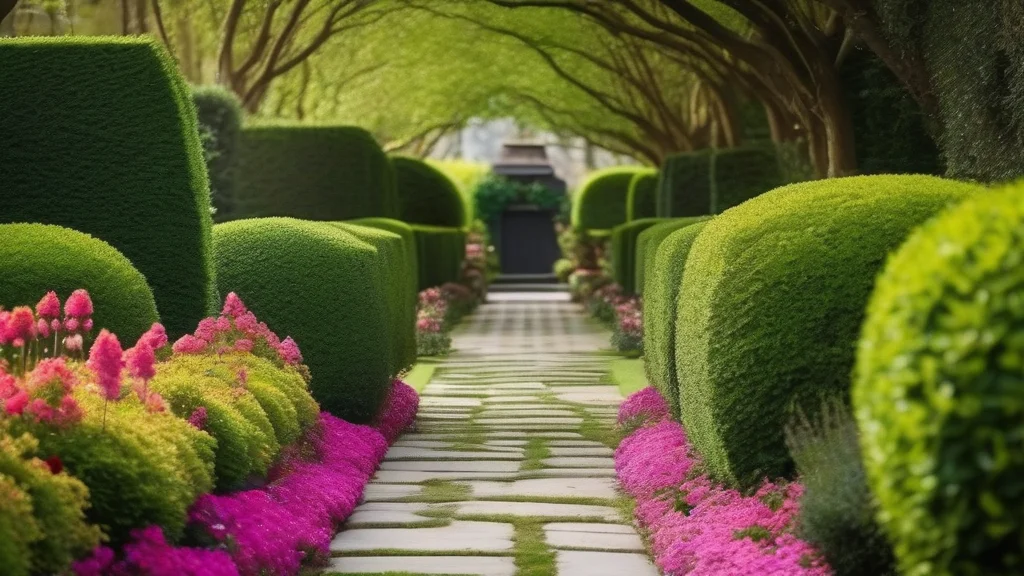
Hardscaping—the non-living elements like paths, walls, and patios—forms the bones of your landscape and offers the best long-term value. The good news is that many of these projects are well within the reach of a motivated DIYer. Materials like gravel, flagstone, and concrete pavers are relatively inexpensive and forgiving for beginners. A simple gravel pathway lined with metal or plastic edging can be installed in a weekend for $200-$400, including materials. This instantly organizes your space and prevents mud trails, a huge upgrade in both function and form.
When planning DIY landscaping hardscape, always start with proper ground preparation, known as sub-base construction. This involves excavating a few inches of soil, laying down a landscape fabric to prevent weeds, and adding a compacted layer of crushed stone. Skipping this step is the number one reason DIY patios and paths fail, leading to shifting, settling, and weed invasion within a year. For small retaining walls or raised bed borders, consider using interlocking concrete blocks designed for DIY use; they require no mortar and create a very professional look.
- Plan and Mark Your Layout
Use a garden hose or spray paint to outline the shape of your path or patio on the ground. This lets you visualize the size and adjust before any digging begins.
- Excavate and Prepare the Base
Dig out 4-6 inches of soil. Lay down quality landscape fabric, then add and compact a 2-3 inch layer of crushed gravel or stone dust for a stable, draining foundation.
- Install Edging and Place Materials
Secure rigid plastic or metal edging along the sides to contain your materials. Then, carefully place your pavers or pour your gravel, leveling as you go.
- Finishing Touches
For pavers, sweep polymeric sand into the joints and mist with water to lock them in place. For gravel, rake smooth and consider a stabilizing product to reduce shifting.
Rent a plate compactor from your local hardware store for about $70 per day. It's essential for properly compacting the gravel base under patios and walkways, ensuring they stay level and stable for years, preventing costly repairs.
Instant Curb Appeal: Staging Your Landscape
If you need a dramatic change fast—say, for a home listing or a summer party—focus on staging. This is the art of making your existing landscaping look its absolute best with minimal new investment. Start with a deep clean: pressure wash your driveway, walkways, and house siding. Next, redefine all edges with a sharp, clean trench between your lawn and planting beds. Add a 2-3 inch layer of fresh, dark mulch to all beds; this single action makes plants pop and looks incredibly well-maintained. The total cost for these tasks is often under $300 if you do the work yourself.
Then, add strategic "accessories." Paint your front door a bold, welcoming color. Install two large, identical containers on either side of your entryway, planted with the thriller-filler-spiller combo we discussed. Replace outdated or broken house numbers and light fixtures. Ensure your lawn is freshly mowed and edged. This kind of targeted staging in your front yard landscaping can create a "wow" factor that makes your home stand out. It’s not about adding more; it’s about making what you have look intentional and cared for.
Hiring the Right Landscaping Pro
While many projects are DIY-friendly, some tasks demand a professional's skill, equipment, and warranty. This includes major grading, installing complex irrigation systems, building tall retaining walls, or planting large trees. When your budget and project scope require pro help, knowing how to hire is crucial. The right landscaping contractor will save you money by doing the job correctly the first time, with the right materials. Always start by getting at least three detailed, written estimates. These should break down costs for materials, labor, and a clear project timeline.
Vetting is non-negotiable. A reputable landscaping company will be fully licensed and insured—ask for proof. They should provide a list of recent local references and have a portfolio of completed work similar to your project. Check online reviews across multiple platforms, but pay special attention to how they respond to any negative feedback. Be wary of anyone who demands a large cash deposit upfront or pressures you to sign a contract immediately. A trustworthy pro will give you time to review their proposal. For a streamlined way to connect with pre-vetted local professionals, services like HomeProMatcher can eliminate the guesswork by matching you with licensed pros based on your specific project needs.
HomeProMatcher
A service that connects homeowners with licensed, insured, and reviewed local landscaping professionals. Instead of endless searching and cold-calling, you describe your project, and they match you with pre-screened pros who can provide competitive quotes. It's designed to save time and reduce the risk of hiring an unreliable contractor.
Red Flags and Must-Ask Questions
Protect your investment by knowing the warning signs of a problematic contractor. A lack of a physical business address, refusal to provide a detailed contract, or only having a P.O. box are major red flags. So is a quote that seems too good to be true—it usually is, and often leads to subpar materials or unexpected charges later. Your contract should specify the exact materials (type, grade, quantity), start and completion dates, payment schedule, and a process for handling changes or unforeseen issues.
Before signing, ask these essential questions:
- What is your licensing number? — Verify it with your state's licensing board.
- Can I see your certificate of insurance? — Ensure they have both liability and workers' compensation coverage.
- What is the project timeline? — Get specific start and completion dates in writing.
- How do you handle change orders? — Any mid-project changes should be approved in writing with a clear cost.
- Do you offer a warranty on workmanship? — A standard warranty is often 1-2 years for labor.
Using a platform like HomeProMatcher can pre-answer many of these questions, as they typically verify license and insurance status before a pro joins their network. This due diligence is a core part of effective, stress-free landscaping project management.
Important
Never pay the full amount for a landscaping project upfront. A standard payment schedule is one-third to start, one-third halfway through, and the final third upon satisfactory completion. This protects you and ensures the contractor has incentive to finish the job properly.
Frequently Asked Questions
The most affordable landscaping focuses on maintenance and definition rather than new installations. Edging your lawn, applying fresh mulch, pruning overgrown shrubs, and planting a few strategic native perennials from small containers can transform a yard for under $500. DIY projects like gravel paths or building a simple raised bed from untreated timber are also high-value, low-cost options.
A basic, DIY-focused makeover—including a small patio area (gravel or basic pavers), a few new planting beds with mulch and plants, and some solar lighting—can typically be achieved with a budget between $1,500 and $3,000. The cost skyrockets when adding large trees, complex water features, or high-end materials like natural stone. Phasing the project over two seasons is an excellent way to manage cash flow.
To get the best rates and scheduling flexibility, contact landscaping pros during their slower seasons: late fall or early winter. They are more likely to offer discounts and can schedule your spring project early. Avoid peak season (late spring) when demand is highest, leading to longer wait times and premium pricing.
Absolutely. Studies consistently show that well-executed landscaping can increase a home's resale value by 5% to 15%. More importantly, it dramatically boosts curb appeal, which is critical for attracting buyers quickly. Simple, tidy landscaping with healthy plants and clear definitions is often more valuable than an elaborate but high-maintenance design.
Never compromise on the foundation. Whether it's the quality of soil you plant in or the crushed stone base under a patio, these unseen elements determine the long-term health and stability of your entire landscape. Spending an extra $100 on good topsoil or proper drainage materials can save you $1,000 in plant replacements or patio repairs down the line.